How to Make Fermented Foods Using Water-Sealed and Mixed Methods
Vegetables can be pickled through mixed fermentation, also known as sourdough fermentation. We can prepare them in two ways: we add sourdough to the vegetables (this will be the sourdough pickle), or we don’t seal the fermenting vessel airtight (this is the sourdough-fermented pickle).
Understanding Mixed Fermentation
During sourdough fermentation, other microorganisms (mainly yeasts) participate in the fermenting process alongside lactic acid bacteria. If we add sourdough to the pickle, then the yeasts, lactic and acetic acid bacteria present in it will determine the fermentation. If we leave the fermenting vessel open (for example, just cover it with a small plate), then the yeast cells multiplying on the surface of the brine will complement the lactic acid fermentation taking place below the brine. This is precisely why the preparation and consumption of sourdough vegetables should be avoided for those with yeast allergies.
Accelerating Mixed Fermentation
Mixed fermentation is accelerated if we keep the container with vegetables in a very warm place (for example, in blazing sun). It also promotes rapid multiplication of microorganisms if we add easily accessible carbohydrates for them (such as bread slices or fruits) to the developing pickle.
Slowing Down Fermentation
Other well-known practices have the opposite effect. For example, if we omit bread, or replace it with fermentation-slowing plants (potato slices, horseradish, sour cherry leaves, grape tendrils). It’s logical that cucumbers remain firmer and crispier if we suppress and don’t encourage gas formation, right?
Characteristics of Sourdough-Fermented Vegetables
Sourdough fermentation always produces mildly alcoholic, initially strongly carbonated, quickly spoiling pickles that must be put in the refrigerator immediately after completion and should be consumed within a few days.
This is an excellent method for getting probiotic pickles that can be consumed fresh as quickly as possible, but it’s only worth trying on persistently warm summer days with seasonal vegetables. At any other time of the year, or if we want to preserve our pickles for longer than a few days, we should always choose airtight sealing, i.e., pure lactic acid fermentation.
Using Water-Sealed Rim Fermenting Vessels
Glass Vessel Preparation
Glass water-sealed rim fermenting vessels are very easy to use. Of course, they are much more fragile than their ceramic counterparts, but the spectacular sight of fermenting vegetables compensates for the caution required. Before and after fermentation, apart from thorough washing, we have nothing else to do with them, and the same rules apply to filling them and fermenting in them as for clay vessels.
Ceramic Vessel Preparation
An important criterion for ceramic fermentation vessels is that they should be fired at high temperature and/or coated with lead-free glaze, otherwise liquid will continuously seep from them. On the bottom of glazed barrels and on the rim of their lids, there are usually unglazed parts – only here can they absorb and release some water.
It’s worth soaking the lids in plain water before use. This prevents them from absorbing liquid from the rim (since if the groove dries out, the pickle can spoil).
I place the clay vessels in plastic crates or basins filled with plain water even before putting them into use. They work well without this too, but this little trick has several advantages. Firstly, the vessels can absorb water through the unglazed part found at their bottom if necessary. Secondly, they can be kept at a slightly more even temperature this way, and thirdly, if we accidentally overfill the vessel, the bubbling pickle brine flowing into this water will be less prone to spoilage (and easier to clean up afterward).
Fermentation with Salt Brine
Salt Brine Method Setup
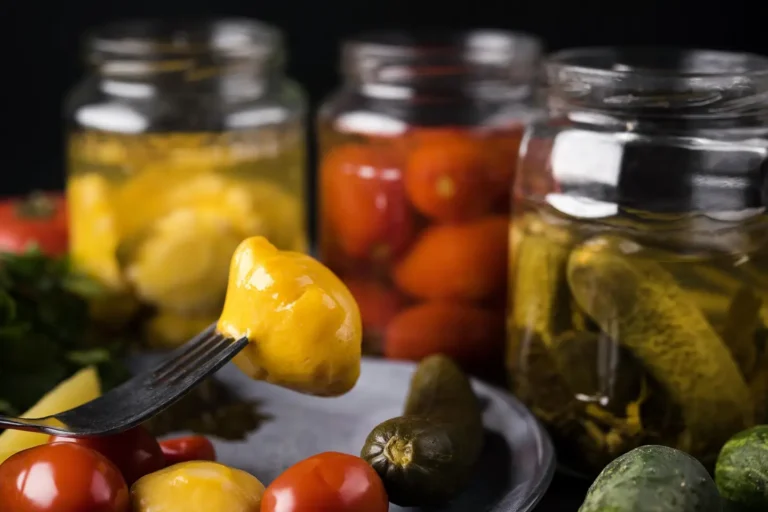
For brine fermentation, sprinkle the spices at the bottom of the vessel. Place loosely chopped vegetables in the ceramic fermenting vessel so that maximum 10 cm of empty space remains below the vessel’s mouth. The minimum filling amount is 1/3 of the vessel. If we put more in, that’s only good, but if we overfill the clay pot too much, the pickle can lift the lid and flow out of the vessel. Glass vessels should be filled with vegetables up to the lower part of the neck.
Adding Brine and Weights
If necessary, place a weight on top of the vegetables and pour 2% salt solution over them so that the liquid covers the weight by 1-2 cm as well. Such a vessel generally holds vegetables cut into larger pieces with a weight corresponding to 50-60% of its volume capacity.
Dry Salt Fermentation Method
Dry Salting Process
Thoroughly knead the dry-salted ingredients in small batches and place them well-pressed into the vessel. This makes fermentation much more controllable than just sprinkling salt between layers of vegetable strips.
I usually fill ceramic vessels with thoroughly kneaded, salty vegetables until my fist can still fit inside below the water rim. You can fill a bit more, but then the developing gases will push up the pickle so much that brine or vegetables might get into the water rim – this increases the risk of contamination.
Handling Settling and Air Gaps
If the ingredients settled too much during kneading and an air gap larger than a fist remains inside, we can supplement it with fresh, salt-kneaded vegetables at most the next day. Until then, press down the pickle with some food-safe and acid-resistant weight, and fill the empty space in the vessel as much as possible (for example, with a plate and a jar filled with water).
In this case too, fill glass vessels up to the lower part of the neck, pressing down the salty vegetables thoroughly, layer by layer, with the help of a pounder.
A larger water-sealed rim fermenting vessel generally holds dry-salted vegetables (such as cabbage) with a weight corresponding to 80-90% of its volume capacity.
Airtight Sealing Process
Once the vessel is full, clean the rim groove, put on the lid, and fill the groove with water. While the vegetables are in the vessel, continuously replenish the evaporating water in the rim.
Fermentation and Aging
It’s worth keeping the fermenting vessels in a warm place (20°C or above) for the first few days and not opening them at all. The forming gases escape from the water poured into the rim in the form of bubbles, accompanied by tinkling or popping sounds. The slowing of bubble movement indicates that the fermentation is starting to near its end. At this point, we can carefully look under the lid and even taste the vessel’s contents (only reach in with a clean tool).
Storage and Portioning
Long-term Storage Options
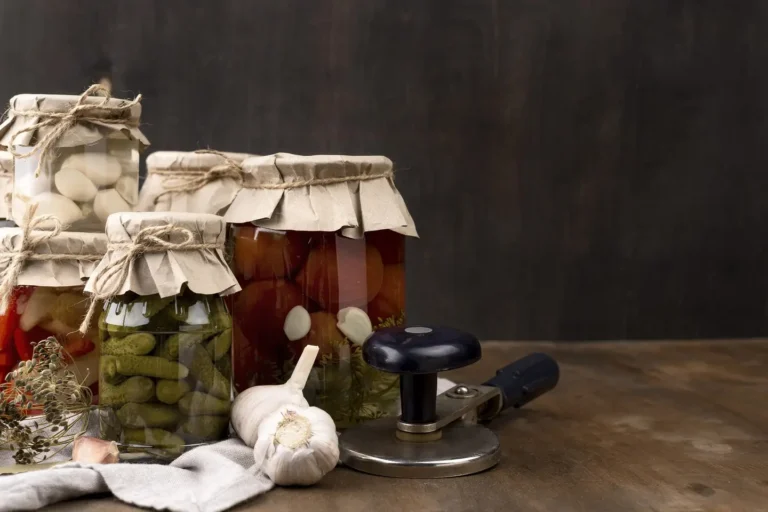
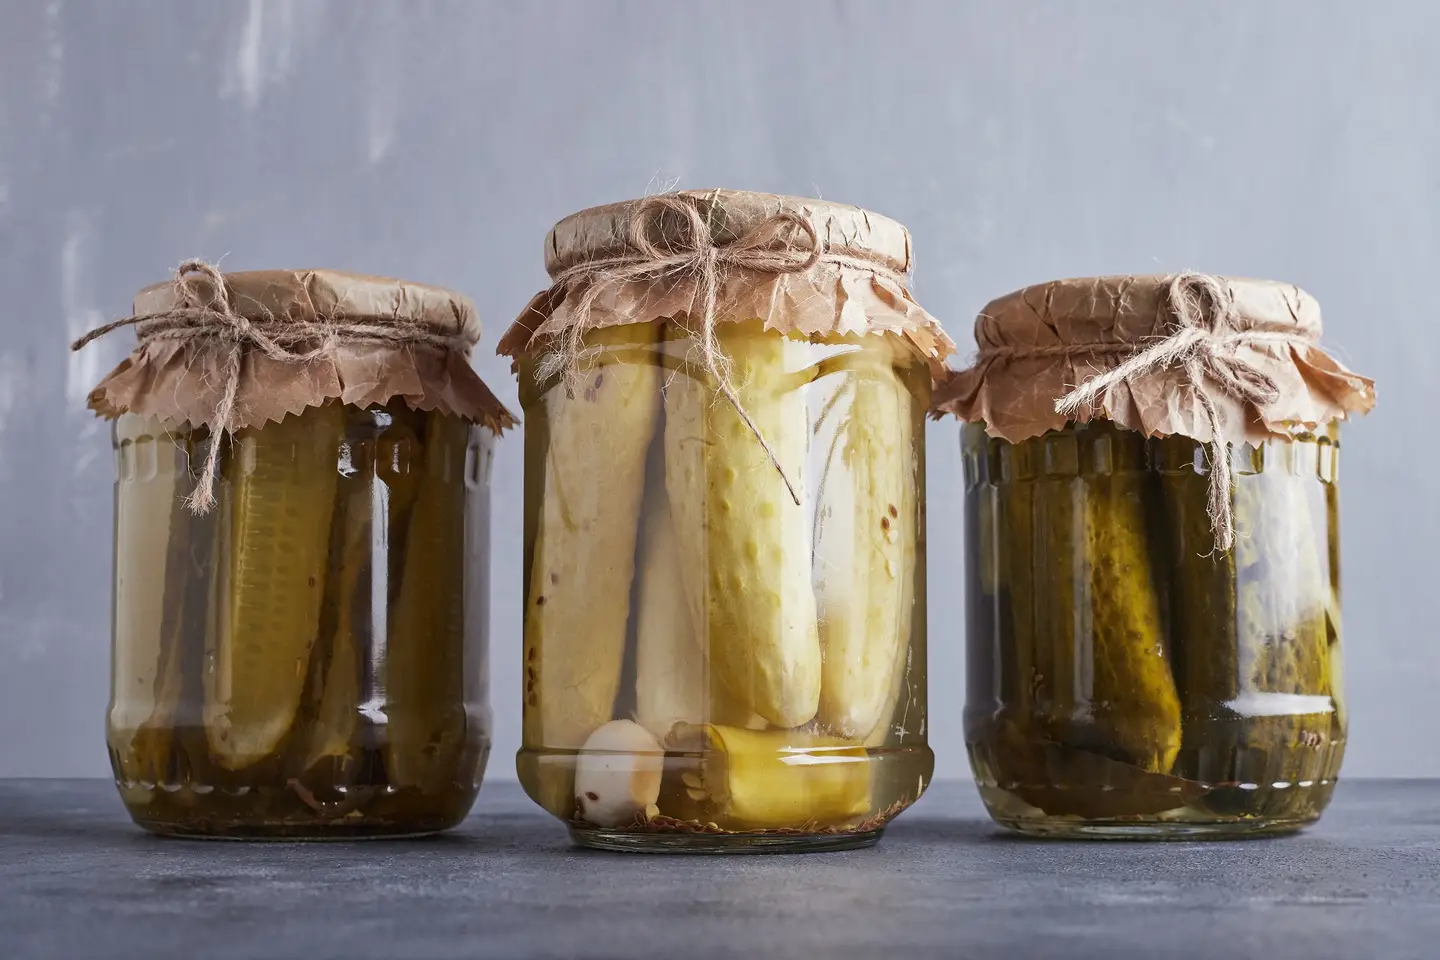
For long-term storage, either portion the pickle into smaller jars or find the coolest possible place for the fermenting vessel. Get a suitable weight for it, or use a simple glass or porcelain plate weighted down with a water-filled jar. If we manage to keep the mature pickle continuously under its own brine, we can also minimize the risk of spoilage. Make sure that when we take pickle out of the vessel, we always reach in with a clean tool, then press the remainder back under the brine.
Portioning into Smaller Containers
Naturally, we can also distribute the finished pickles into smaller jars. We can do the same if we prepare larger batches in five-liter canning jars instead of water-sealed rim vessels.
For portioned batches to be preservable for a long time, thoroughly clean the jars beforehand, then fill them completely with the fermented vegetables (again, leave at most 1-1.5 cm empty space in the jar). Pour dry-salted pickles up to the brim with their own brine or 1% salt solution.
Final Sealing Steps
If only a little liquid is missing from them, we can use plain, chlorine-free water, but then sprinkle a pinch of salt on top of each jar before sealing. After pouring, tightly screw the lids onto the jars. They can safely remain at pantry or room temperature until opening, but afterward store them in the refrigerator.
Troubleshooting During Fermentation
Bubbles and Pressure Issues
The nutrition of lactic acid bacteria, i.e., lacto-fermentation, produces carbon dioxide as a byproduct alongside lactic acid. Therefore, the formation of tiny bubbles, the fizzing of the jar, the “biting” carbonation of the brine are natural parts of the fermentation process (beginning).
The higher the carbohydrate content of the plant we’re fermenting, the more intensive the first phase of fermentation will be. It may happen that the forming bubbles combine into a thick foam layer on top of the brine, which is also a normal phenomenon – we don’t have any particular task with it.
Managing Pressure in Different Container Types
When fermenting vegetables, despite the initial intensity, we don’t need to fear explosion. However, always check that our jars haven’t cracked or been damaged. Don’t use any vessel showing any suspicious signs for fermentation!
The lids of screw-top canning jars are sufficiently flexible to eliminate overpressure without external intervention. During canning, this flexibility allows the vacuum to suction the lid onto the cooling jar. During fermentation, the exact opposite happens: the internal pressure domes the lid, and exactly as much gas and liquid escape alongside the threads as necessary. The carbon dioxide remaining inside the undisturbed jar acts as a protective gas and protects the pickles from pathogen colonization.
Daily Maintenance During Active Fermentation
Empty and dry the trays placed under the jars daily during the first phase of fermentation so that pathogens cannot settle on top of the spilled brine. Once the main fermentation is complete, gas formation and brine dripping will also stop.
Advanced Pressure Management
Manual Pressure Release Technique
If we’re not fermenting in pressure-equalizing (water-sealed rim or bubbler) vessels and we’re concerned about the developing overpressure, then during the first phase of fermentation, carefully release excess carbon dioxide from the jar once daily.
On screw-top canning jars, it’s enough to just loosen the lid a bit, and the bubbles will immediately break through from the depths. We’ll hear a hissing sound, which will be accompanied by gentle or lively movement among the vegetables. Don’t unscrew the cap completely and don’t lift it off unless we see something from the outside that needs checking.
Clamp-lid Jar Management
On clamp-lid canning jars, while intensive gas formation lasts, carefully pull the sealing ring’s tab once or twice daily, so excess carbon dioxide can easily escape. If this isn’t enough, hold down the vessel’s lid with one hand and slowly loosen the closure mechanism with the other. Don’t try this when fermenting high-sugar fruits and alcoholic beverages, as it’s dangerous! Always use a bubbler for those.
It’s natural that everyone initially watches the happenings in the jar suspiciously, but over time we’ll experience that everything will be fine without hissing too.
Common Fermentation Phenomena
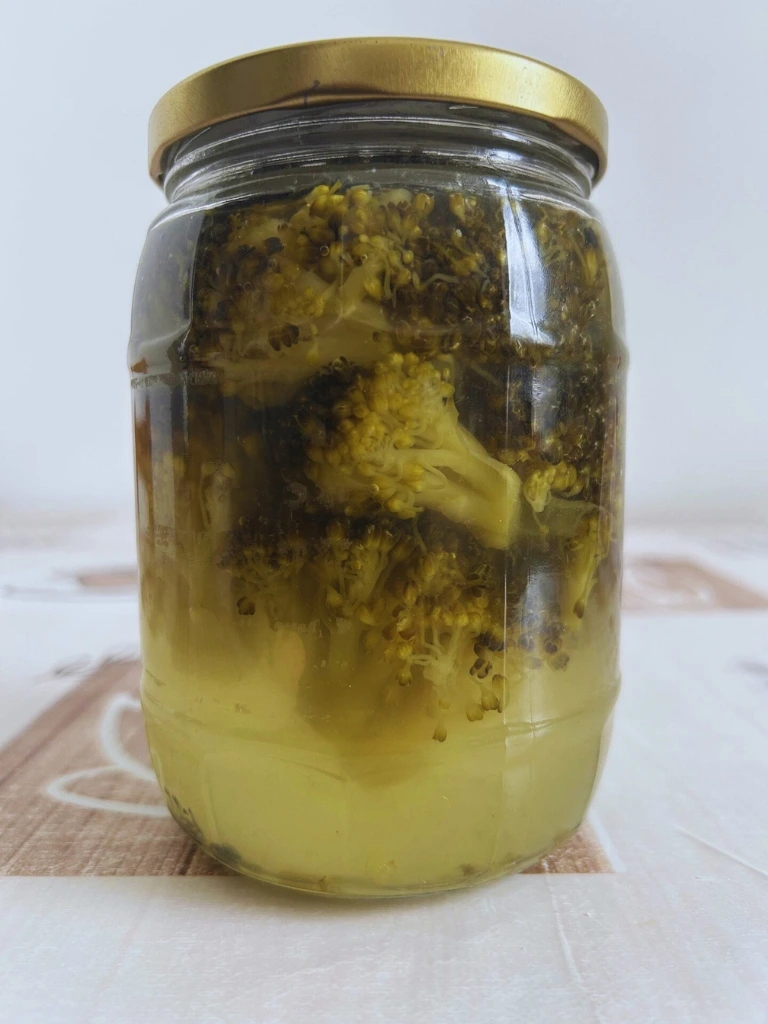
Cloudy Brine and White Sediment
At the beginning of fermentation, it’s natural for the salt brine to become opalescent. Within a few days, a white sediment layer also forms at the bottom of the jar or on the surface of the vegetables, which consists of the particles causing the cloudiness. These are actually byproducts of lactic acid bacteria work, and as long as gas formation lasts, they swirl around in the jar. As carbon dioxide production ceases, the brine clears again.
A white sediment ring usually appears at the bottom of dry-salted pickles too – this is also a natural accompaniment of the process. We have nothing to do with it.
Unusual Odors
As a beginner fermenter, the smell of developing pickles will probably seem unusual. For example, the smell of higher sulfur-content vegetables (cabbage and onion families) can be somewhat unpleasant in the first days, similar to rotten eggs. The release of other aromatic compounds can also have characteristic odor effects, but these without exception give way to pleasantly tangy scents within a few days.
The aroma of the finished product is slightly different for each vegetable and spice combination. Therefore, I recommend that we first make pickles we already know well – for example, dill-garlic cucumber or classic sauerkraut. This way we gain some experience, and later, whatever ingredients we work with, we’ll easily be able to distinguish properly fermenting products from batches starting to spoil.
Always trust our senses! If we find something very unpleasant, don’t force it – rather pour it on the compost and make a new batch.
Color Changes and Visual Indicators
Natural Color Transformations
During fermentation, it’s inevitable that the appearance of ingredients changes, as enzymatic breakdown and pH decrease also affect the plant’s pigments.
Plant dyes dissolve due to osmosis and can color the pickle brine various shades. We don’t have much to do with this – simply enjoy nature’s wonders!
It’s also a natural phenomenon for garlic cloves in a jar to take on bluish or greenish tints. This is a completely harmless, simple chemical reaction due to one of garlic’s sulfur-containing compounds. The discolored garlic can be safely consumed along with the rest.
Problematic Color Changes
Vegetables turning darker can be attributed to various causes. It may happen that we used too hard or mineral-rich (for example, iron-rich) water, or copper or lead-containing tools, causing dissolved substances in the brine to react with pigments found in plants. If we suspect the water used is the culprit, have it tested or replace it!
If our fermenting vessel doesn’t seal well (it’s possible that the thread just caught wrong), or if fermentation started too slowly, then the upper part of the pickle can easily oxidize. The sign of this is that the top of the fermenting vegetables has visibly discolored (faded or browned). In this case, open the jar, spoon out the oxidized layers with a clean tool, and fill the remainder with 2% salt solution.
Check that the lid isn’t damaged, and replace if necessary. When we reseal the jar, check with a tilt test that it definitely seals well.
Liquid Degradation Issues
Strained pickle brines (cabbage juice, kvass) can also oxidize in the refrigerator within a few weeks. Their color then visibly fades, their acidity and taste become very dull. If we experience this, rather pour out the brine and make a new batch.
Sound Phenomena During Fermentation
During the active gas formation phase, we can hear different sounds depending on the type of fermenting vessel. There have been cases where someone thought unknown noises were a hiding animal or prowling burglar until they leaned close to their fermenting delicacies.
Canning jars make hissing, whistling, sizzling, and puffing sounds, while water-sealed rim vessels cheerfully pop, gurgle, or tinkle. Music to our ears!
Problematic Issues
Slimy, Stringy Brine
Slime appearing in pickle jars is due to overgrowth of so-called heterofermentative lactic acid bacteria (or pectin in the case of fruits). The two most common causes are too low salt concentration and/or keeping the jar in too cold or too warm places (mainly at fluctuating temperatures, for example warm during the day, cold at night).
This problem – although it looks quite repulsive – fortunately poses no health risks. The “slime” is actually a loose network of linked carbohydrate chains, made of very similar material to kefir grains. It’s a very common phenomenon during season changes and cold front intrusions.
Correcting Slimy Fermentation
We can restore the disrupted microbiological balance by increasing our fermenting pickle’s salt content (for example, sprinkling a pinch of salt on top) and keeping it in a consistently warm, 22-24°C place for the next few days. It can also help to spoon a little from a healthy pickle’s brine onto the slimy pickle, or reduce its pH by adding a teaspoon of vinegar or lemon juice (this will also change its taste though).
Kahm (Film-forming Yeasts)
With not completely airtight sealing, a very thin, white, powdery, and easily breakable film can quickly form on top of the brine. If we don’t intervene in time, the film can become quite thick, strangely patterned, waxy layer, which unfortunately also provides an ideal place for mold colonization. This is the so-called Kahm, which comes from the German name for yeast film. Hungarian winemakers also call it flower yeast.
Yeast spores get into the jar from the air or from raw materials, and there they form large colonies in the presence of oxygen. Although it can provide a bizarre sight, we don’t need to be afraid of it: it’s not dangerous to health.
Managing Kahm Formation
During fermentation, also glance at each jar from the side daily (this is why it’s good to ferment in transparent containers). If we notice any white film appearing on the brine surface, open the jar. Remove the film or plaques with a sterile spoon, and if necessary, absorb and wipe away all residue from the jar with paper towels. Make sure not to put our hands in the brine.
If yeast has also colonized protruding plant parts, remove and compost those too. Replenish the missing brine or sprinkle a pinch of salt on top of the pickle. Then carefully seal the jar with an undamaged lid (check by tilting that it doesn’t leak).
Serious Contamination Issues
Mold Problems
Unlike film-forming yeasts, mold colonies are not at all harmless formations. They can appear on jar rims, on tips of protruding plant parts, even floating on top of the brine, or “parasitizing” on Kahm colonies.
Molds can be most easily recognized by their hair-like spore-bearing heads. Their color can vary from white through green and red to dark gray or black, depending on their type and maturity.
Mold Prevention and Response
Above-ideal temperature and oxygen presence particularly favor mold reproduction, so in this case too the best defense is prevention: fermentation in hermetically sealed jars at not too high temperature. However, opinions are divided on whether our pickle can be saved if the damage has already occurred.
Some believe that after removing the mold layer and affected, discolored plant parts, the vegetables fermented below the brine in an oxygen-free environment are still safely consumable, and some only spare the pickle if mold appeared exclusively on the jar. I’m more cautious than these, perhaps extremely precautious. Since invisible fungal threads (hyphae) and toxins may have penetrated deep into the food, I send all wild-fermented pickles to compost where I detected the slightest sign of mold appearance. I’d rather make another jar – it’s not worth risking.
When Nothing Happens
Troubleshooting Slow Fermentation
Indeed, it can also be suspicious if there’s too much silence around the fermenting vessels. If bubble formation doesn’t start within a few days after preparation, let’s think through whether we did everything correctly.
It may happen that we chose raw materials whose carbohydrate content is harder to access or contains too many antibacterial active substances. Didn’t we accidentally use too much or iodized salt? Did we perhaps work with sterile (heat-treated) raw materials? Are we keeping the pickles in at least 18°C rooms?
Accelerating Slow Fermentation
We can speed up the process by providing a slightly warmer environment for our developing delicacies. If we’ve already waited a long time with patience and still nothing is happening, add starter culture (probiotics, vegetable fermentation starter, finished pickle brine, yogurt, or whey) to the vegetables.
Missing Brine Issues
Understanding Brine Loss
At first glance, it can cause concern if a lot of brine ends up on trays during the fermentation frenzy, while it visibly diminishes in our canning jars. This only presents a real problem if our container doesn’t seal well, or we opened the lid during the fermentation process. If the closure is tight, then only the excess can flow out under the lid, but nothing can get back in. The jar then contains not air, but carbon dioxide, i.e., protective gas.
When to Replenish Brine
However, if we opened the jar, or there’s suspicion of a sealing problem, definitely replenish the missing brine with 2% salt solution.